On-the-Fly SfM System Instructions
Download the On-the-Fly SfM
Install the On-the-Fly SfM
The system installation package contains an .exe setup file and the environment files required to run the system.
Double click the “On-the-fly SfM Setup.exe” to start installation.

Click “接受” to the next step.
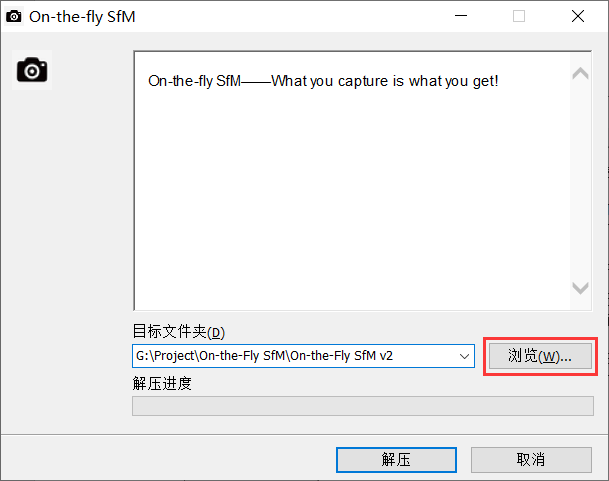
You can select the path you want to install by clicking “浏览”. Then click “解压”, and wait for the installation to complete.

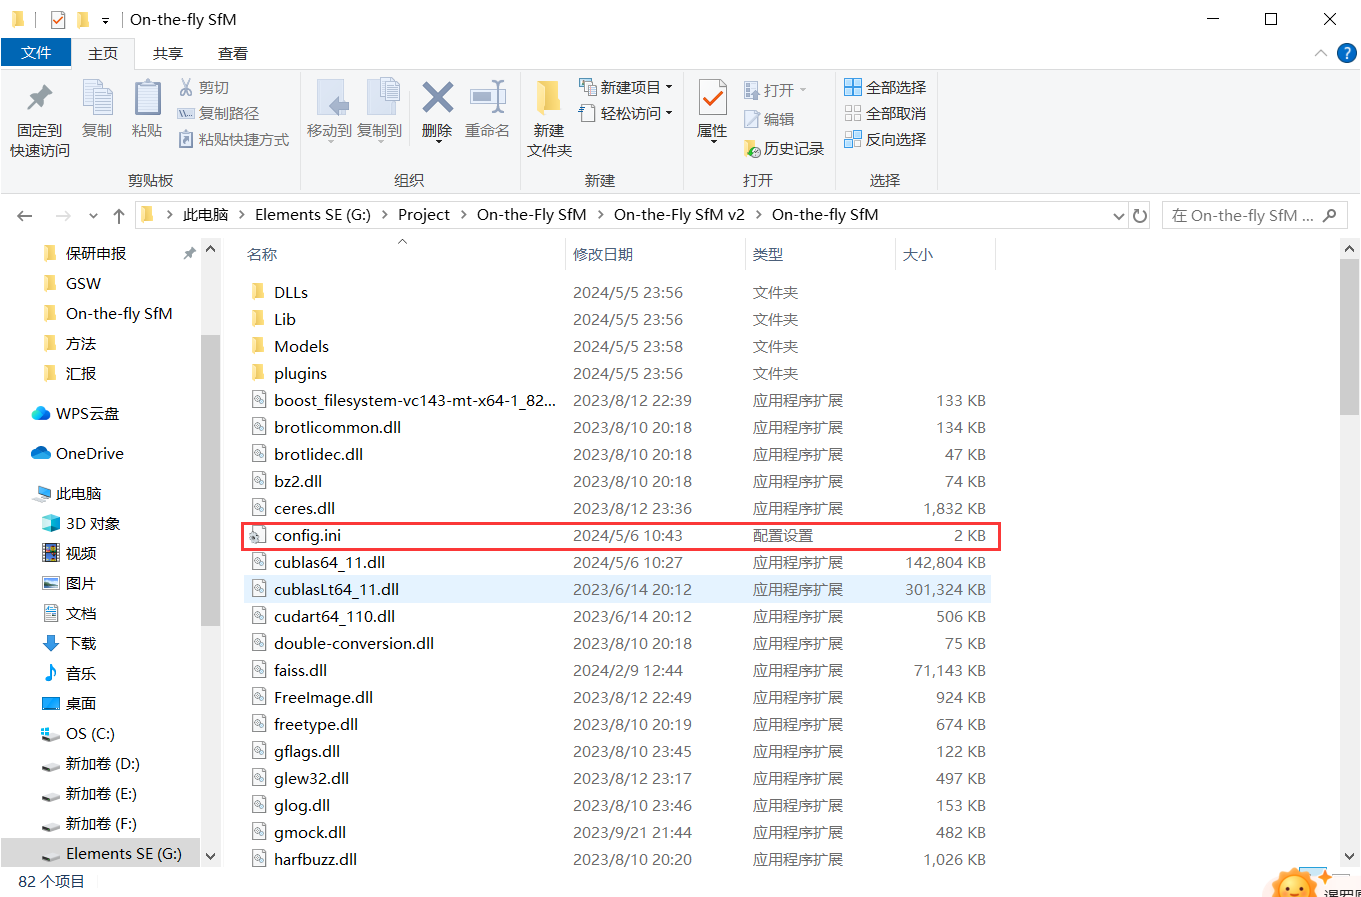
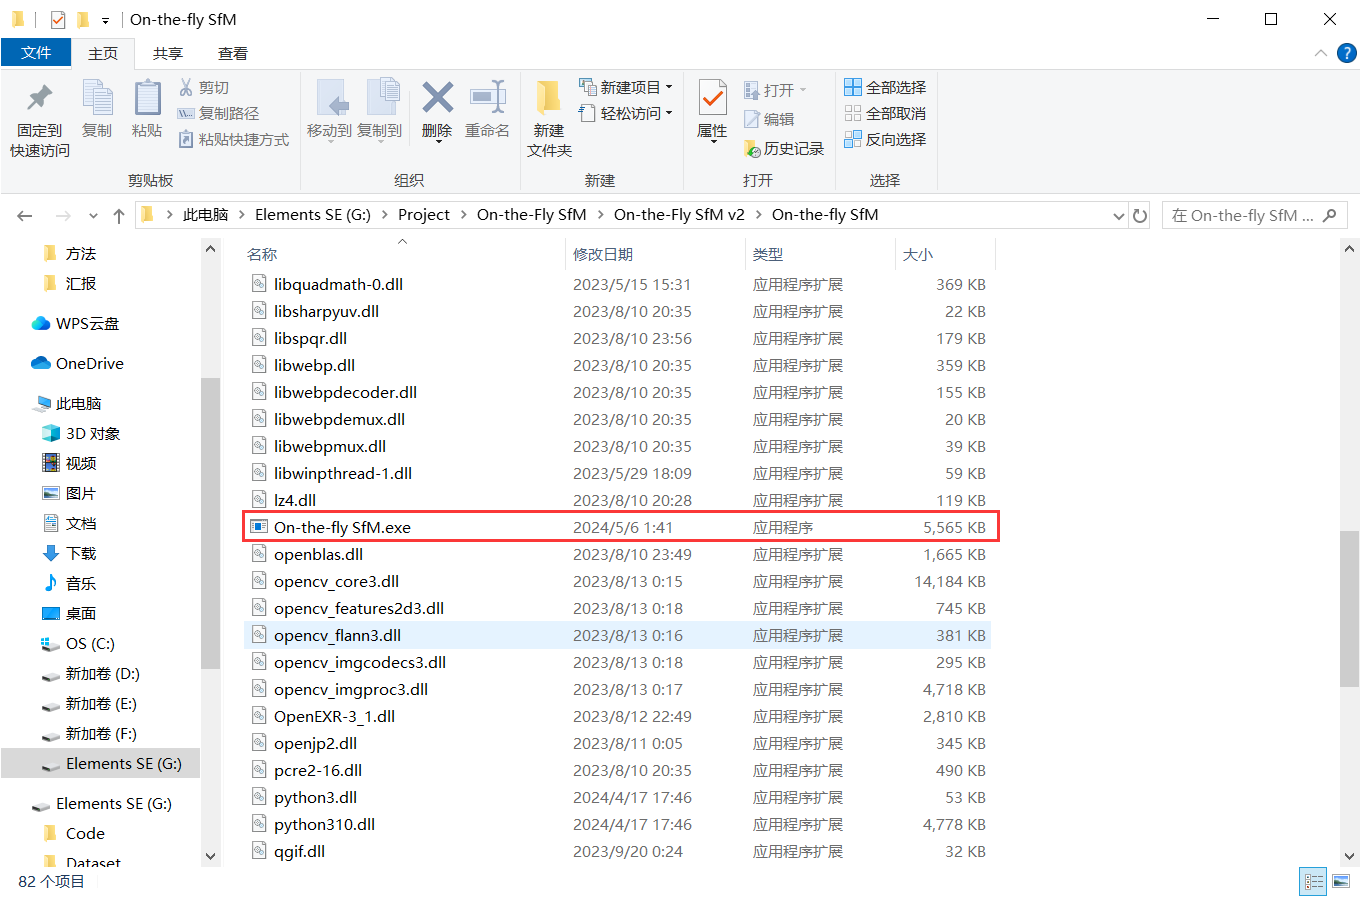
After the installation finished, you will get the above folder.
Then, Copy the DLLs and Lib folders in the compressed package to the above folder.
After the installation is completed, the directory structure should be as follows:
Root folder (“On-the-fly SfM” folder in this document)
DLLs
Lib
Models
On-the-fly SfM.exe
…
Attention:
CUDA is necessary, otherwise it may lack some dynamic library DLL. (CUDA12.2 works, other versions are not tested yet). The recommended GPU memory is at least 8GB.
All paths must be in English letters, and should not contain any special characters (such as spaces).
Project configuration
Before using it, you need to configure the environment:
Open “config.ini” with notepad.
The paths of the “pthPath”, “HDF5Path”, “checkPointPath”, and “PCAModelPath” are recommended as absolute paths. (The full file path where it located, such as the picture above)
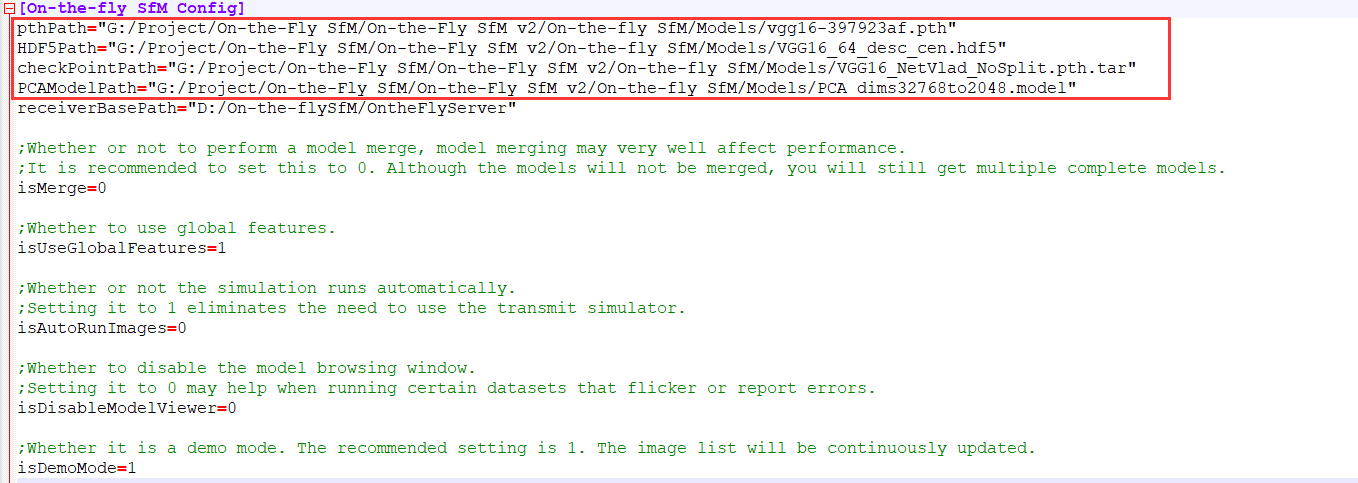
If “isAutoRunImages=0”, “receiverBasePath” should be set to the app server path. (also should be absolute path).
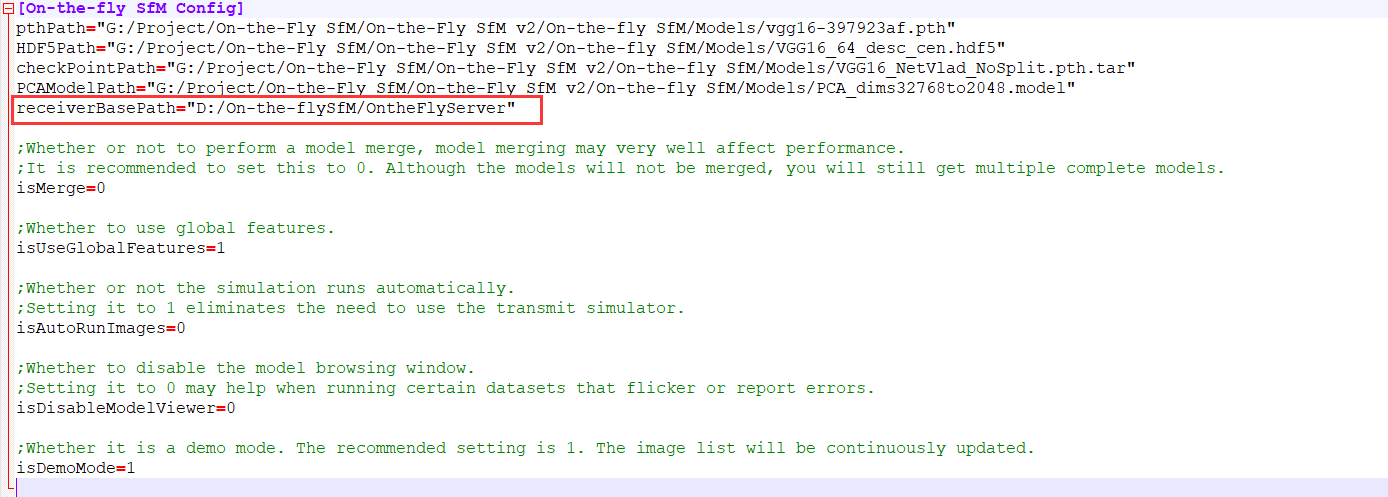
“isMerge” indicates whether a model merge will occur. The default value is 0. The current system takes a long time to merge models, for unknown reasons, so it is recommended to set this to 0 for now, so that you will not merge models, but you will still end up with multiple complete models.

“isUseGlobalFeatures” means whether to use VGG16+NetVlad global features. The default value is 1. If set to 0, the system will only use SIFT to extract features and perform SIFT exhaustive matching.

“isAutoRunImages” indicates whether the image is automatically read to start reconstruction. The default value is 0. If it is set to 1, it can be used for existing image datasets, after specifying the path of the image, the system will automatically pass in the image in order, at this time there is no need to run the app and its server side.

“isDisableModelViewer” specifies whether to disable the model browsing window. The default value is 0. In some rare cases, where the system may flash back or crash when running certain datasets in certain configurations, disabling the model browsing window may be useful for unknown reasons.

“isDemoMode” indicates whether it is in demo mode. The default value is 1. In demo mode, the right image list will automatically be pulled to the bottom as the image is added (this may cause the program to flash or crash for unknown reasons), and reconstruction will begin earlier.

Run On-the-Fly SfM
This system can run on local datasets and can also perform real-time image processing using mobile devices.
Run On-the-Fly SfM with App client
The integrated image transmission system usage instructions are linked as below:
On the fly SfM Image Transmission System Introduction
Next are the On-the-Fly SfM system instructions:
Double click the “On-the-fly SfM.exe” to run.
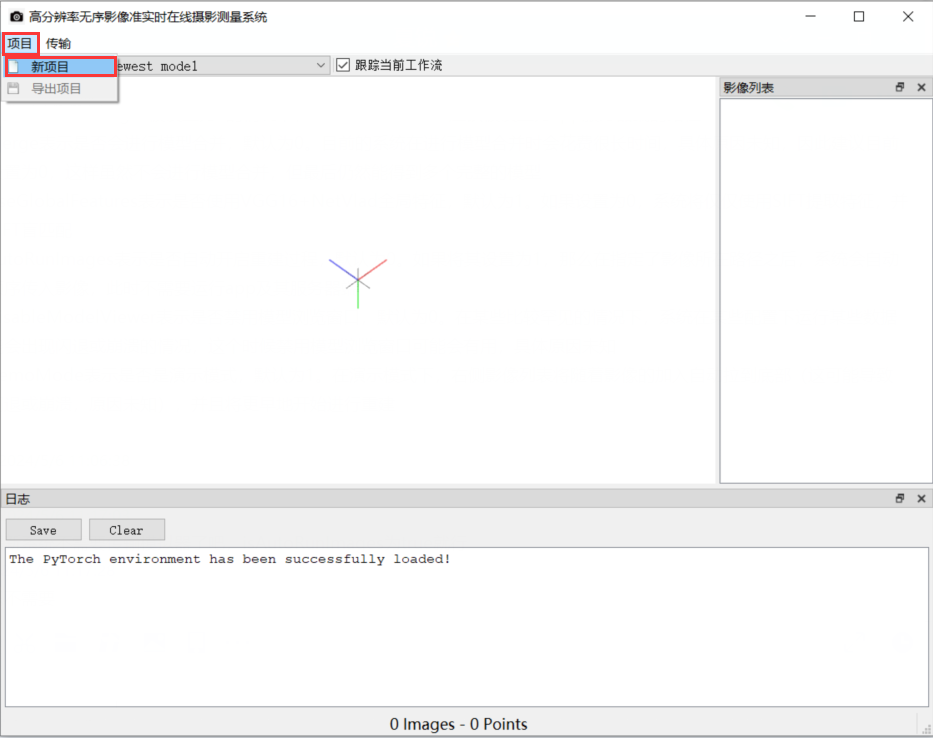
Start by selecting “新项目” under “项目” menu to create Project.

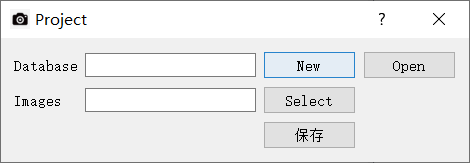
Select the storage path for “Database”.
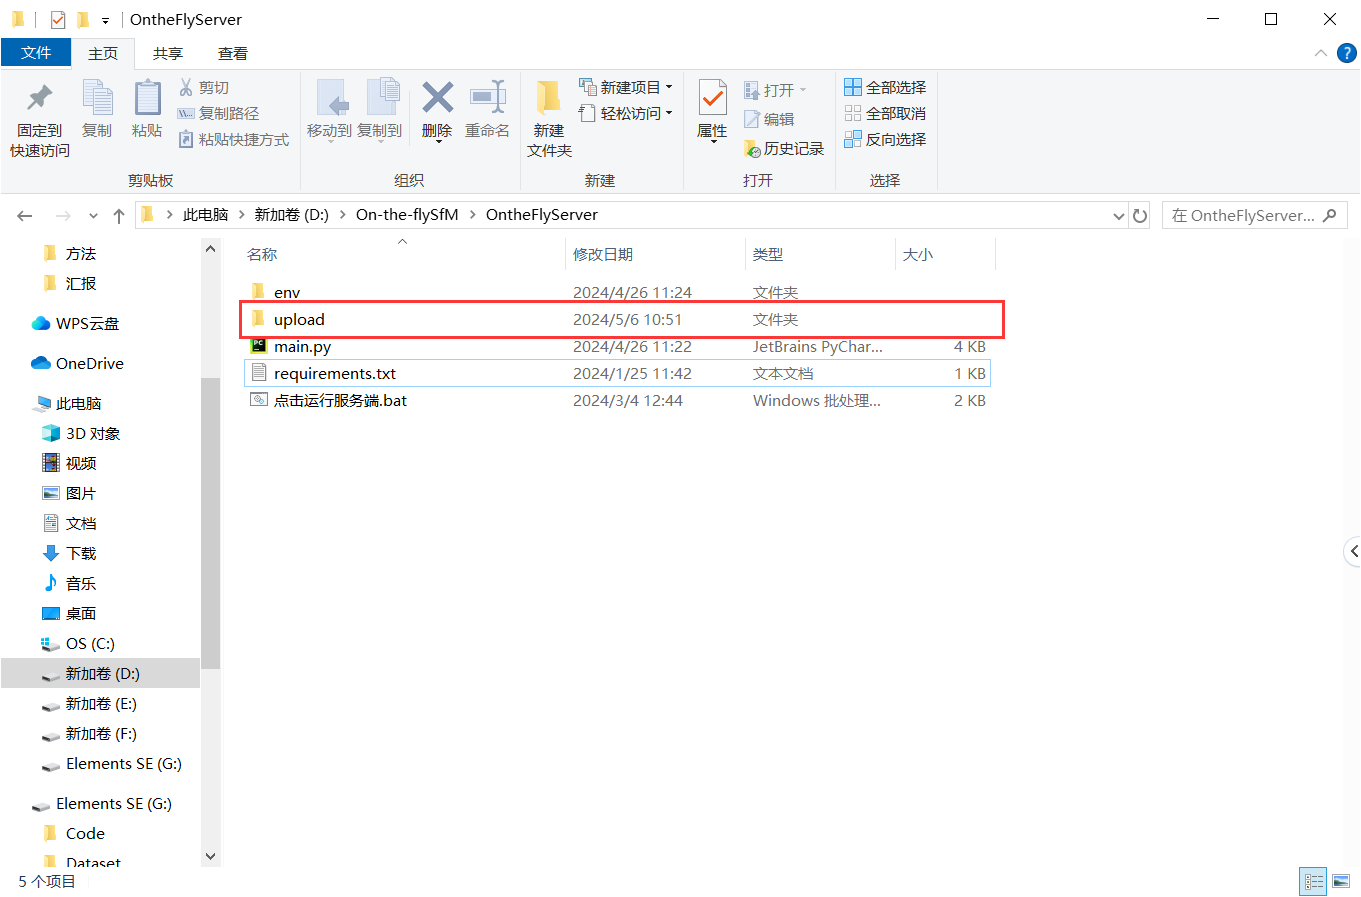
The “Images” path should select the path of “upload” in the app server folder in your computer.
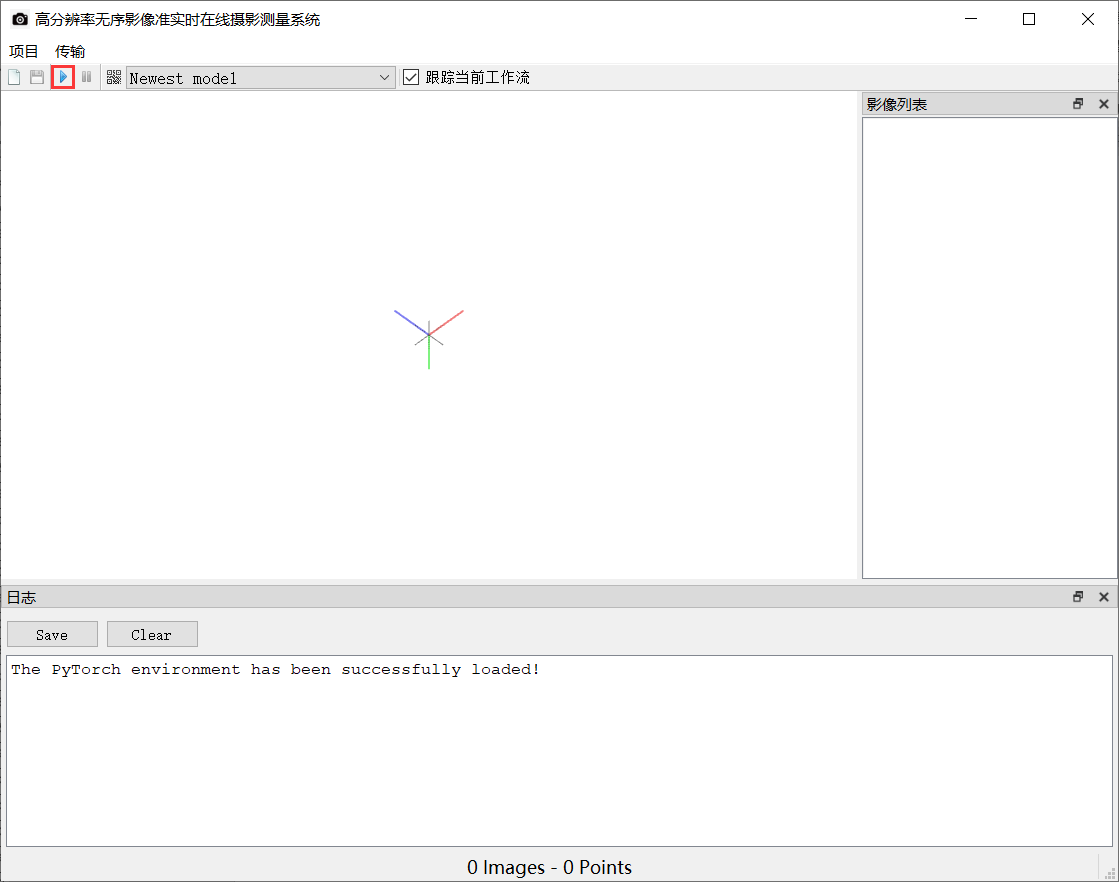
Then, click the “开始接收” button,to start image receiving and processing.

When the reconstruction is finished, click the “停止接收” button to stop receiving images.
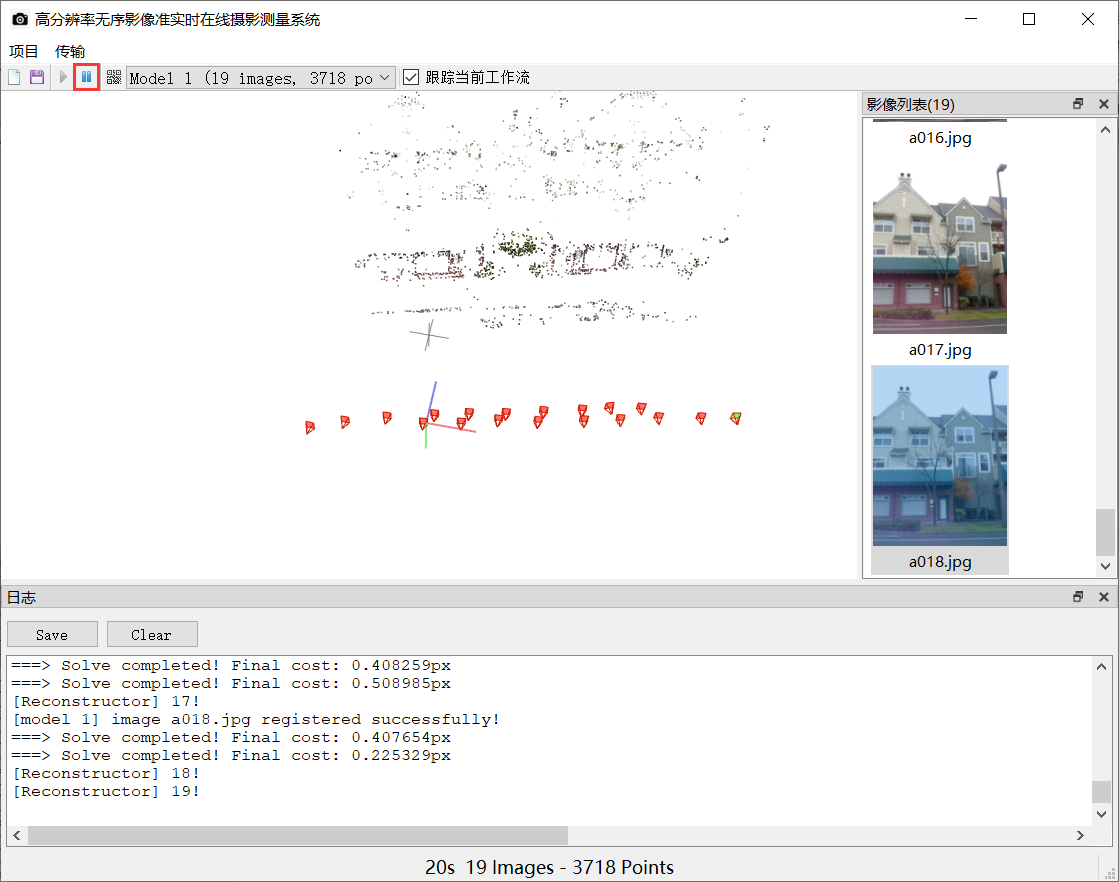
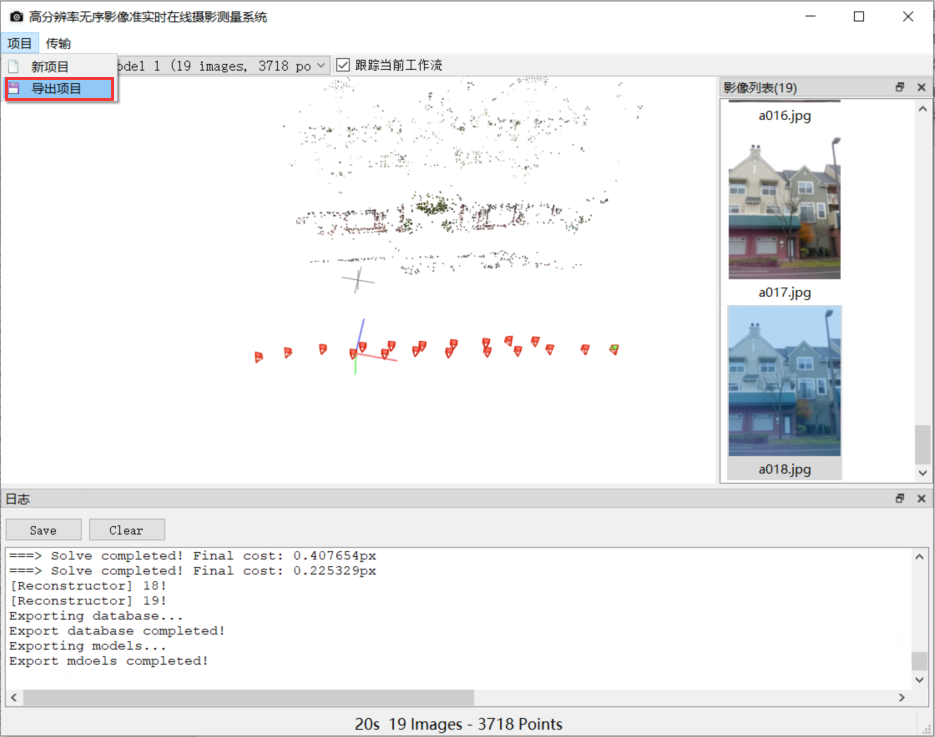
Finally, you can export the model in the “项目” menu.
Attention:
(1) If the End Receive button is clicked while the model is being saved or still being reconstruct, the program is likely to crash. So, before click the End Receive button, you should ensure the reconstruction is finished.
(2) As long as a model exists, it can be exported, whether it is being reconstructed or not.
(3) Only after the model is exported will the database file be obtained on the hard disk, because the system uses the memory database by default instead of the file database on the hard disk.
Run On-the-Fly SfM on the existing datasets
Start by selecting “新项目” under “项目” menu to create Project.

Select the storage path for “Database”.
Select the dataset path for “Images”.
Then, click the “开始接收” button,to start image receiving and processing.
There are two ways to receive existing image data.
(1) We provide a transmission simulator through which you can manually control the transmission of images. In this way, “isAutoRunImages” should be set to 0 in “config.ini”.
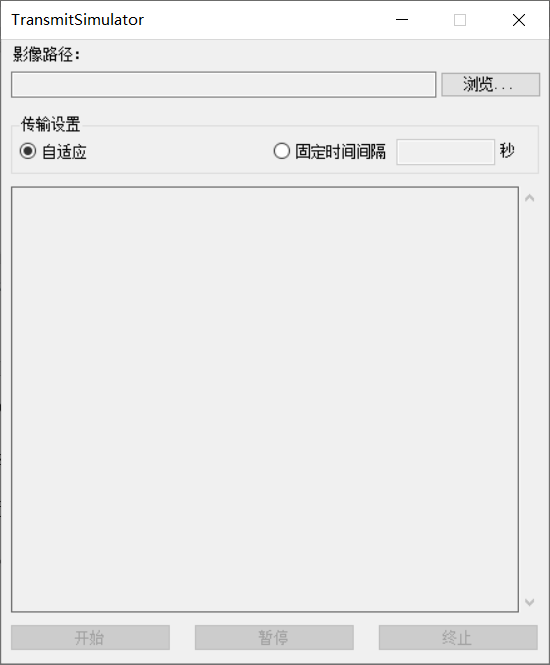
First select the image path by clicking “浏览”.
The “自适应” in the transmission Settings means that a new image is passed in when the previous image is processed; “固定时间间隔” means that an image comes in every few seconds, and the interval can be set by yourself.
Click “开始” to start image transmission;
Click “暂停” to temporarily stop the image transmission;
Click “终止” to terminate the image transmission;
Attention: Before you start using analog transmission, you should start receiving images in On-the-fly SfM.
(2) You can also set “isAutoRunImages = 1”. By doing this, when you click “Start to Receive” button in on-the-fly SfM, The system will automatically read the image from the folder and start processing.
More Attentions
The system has a memory leak issue, and it can be quite difficult and frustrating for individuals to locate and fix these memory leaks alone! If you run the executable file (exe program) directly instead of debugging it in Visual Studio, the system may continue to run in the background of the operating system even after you have closed it. Therefore, after closing the system, it is strongly recommended that you check for the “On-the-fly SfM.exe” background process in the Task Manager. If it exists, please manually terminate the process. Alternatively, when you intend to shut down the system, you can directly use the Task Manager to end the process instead of clicking the close button in the upper right corner of the system.
Due to the limited abilities and personal resources of the developers, and also because the current system is not yet a complete one, it cannot be expected that the system is entirely bug-free, or that its reconstruction results are completely accurate and robust. Furthermore, one cannot expect the system to achieve the desired level of precision or time efficiency entirely. Additionally, the system only implements basic functionalities, including creating projects and exporting models; other functionalities are yet to be implemented.